- Carbide Create — best free starting point, includes V-carving for free, works with any machine
- Easel — easiest day-one experience, but V-carving costs $199/year
- Fusion 360 Personal — most powerful free option, but steep learning curve — learn it second
- You need three types of software — CAD (design), CAM (toolpaths), and a sender (machine control)
- Don't overthink it — pick one and start cutting. You'll switch software eventually, and that's fine

The Software Chain: Why You Need Three Programs
Most people don’t realize this up front: CNC software isn’t one program. It’s a chain of three.
CAD (Computer-Aided Design) is where you draw your part. Think of it like a digital drafting table. You’re creating shapes, text, and geometry.
CAM (Computer-Aided Manufacturing) takes your design and converts it into toolpaths, the specific instructions that tell your router which bit to use, how deep to cut, and how fast to move. The output is a G-code file.
A sender (also called a controller) takes that G-code file and streams it to your CNC machine. It’s the bridge between your computer and the router.
Some programs combine two or even all three of these steps. Easel, for example, handles CAD, CAM, and machine control in one browser window. Knowing this chain exists is half the battle. Once you understand what each piece does, the whole picture makes a lot more sense.
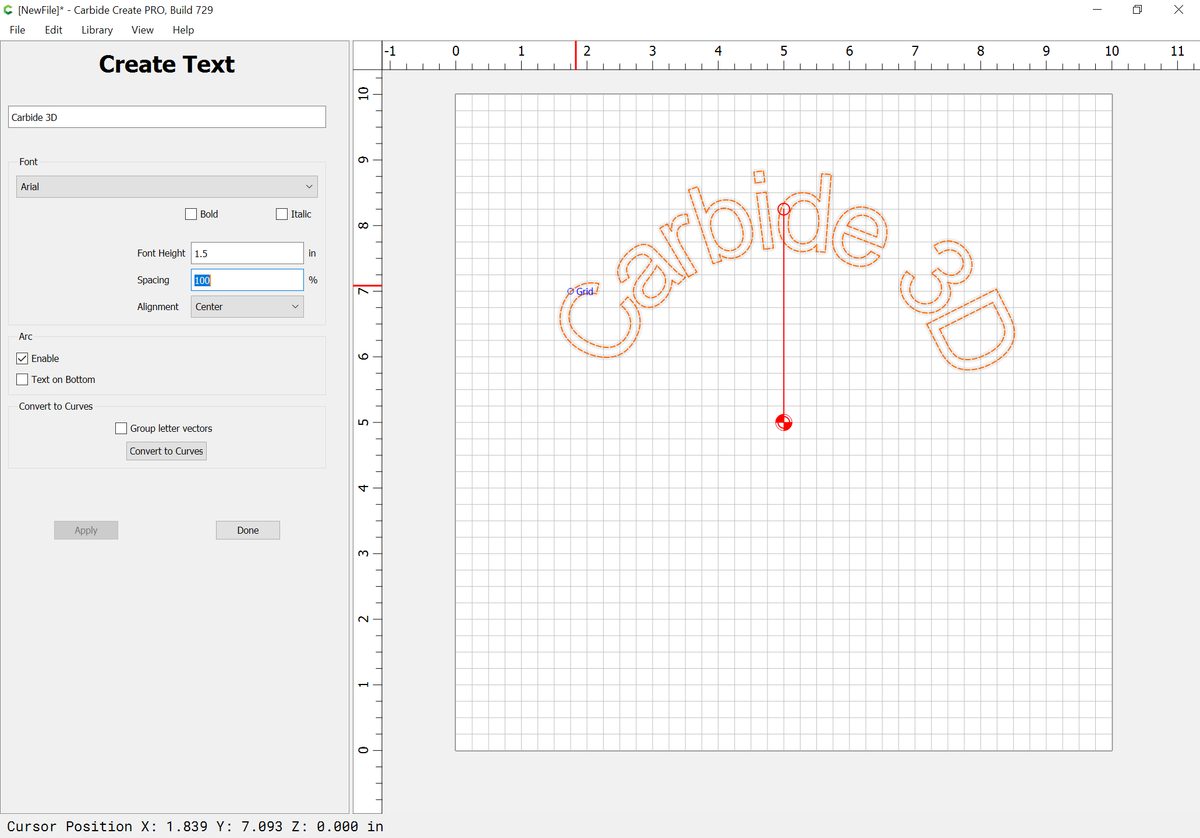
Our Pick: Carbide Create (Free)
If you install one CNC program today, make it Carbide Create. It’s free, it handles both CAD and CAM in one desktop app, and it works with any CNC router, not just Shapeoko machines.
Why it’s our top pick:
- V-carving is included free. Easel charges $199/year for this. Carbide Create just gives it to you.
- It works offline. No internet required, no cloud dependency, no account needed.
- The learning curve is gentle. You can design a simple sign and generate toolpaths in your first sitting.
- It’s 2D/2.5D focused. Which is exactly what beginners need: cut profiles, pockets, V-carved text, and inlays. Pair it with the right starter bits and you’re cutting real projects on day one.
The free version doesn’t do 3D modeling (that’s Carbide Create Pro at ~$120). But honestly, you won’t need 3D for months. Start with signs, boxes, and profile cuts. That’s where the fun is.
Works on: Windows and Mac. Download from carbide3d.com.
Consistently the top recommendation for beginners across dozens of threads. Users praise the free V-carving, clean interface, and the fact that it works with non-Shapeoko machines. Main complaint: no 3D carving without the Pro upgrade.
Source: Reddit
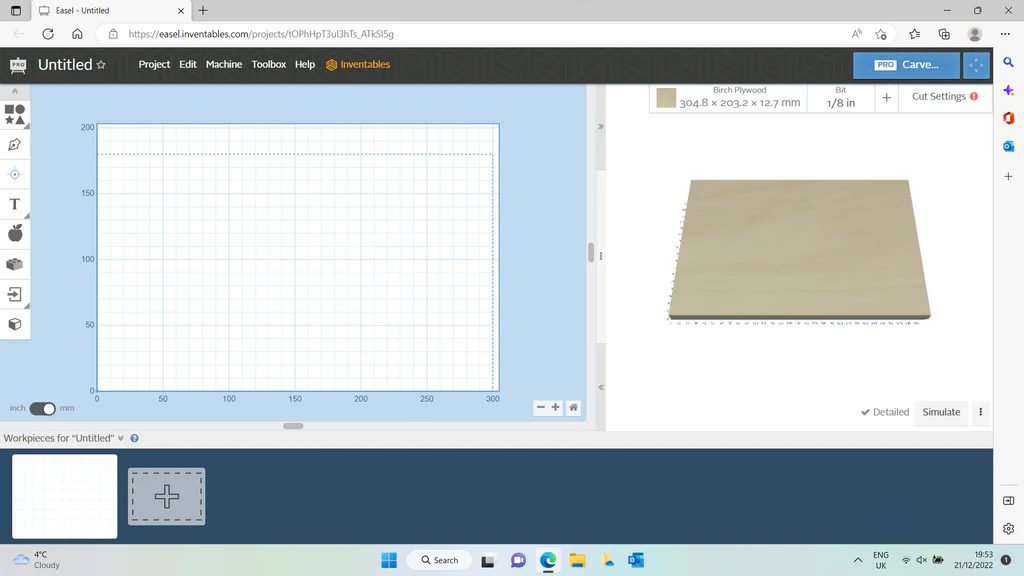
The Easiest Option: Easel (Free Tier)
If Carbide Create is our top pick, Easel is the fastest way to make your first cut. Open a browser, sign up, and you’re designing. No download, no install.
Easel combines CAD, CAM, and machine control in one browser tab. It connects directly to GRBL-based machines (which includes most hobby CNCs). For someone who just unboxed a router and wants to cut something today, nothing beats Easel’s first-run experience.
The catch: Easel’s free tier locks V-carving, advanced toolpaths, and some design features behind a Pro subscription ($199/year or ~$30/month). If you’re cutting simple profiles and pockets, free Easel works great. The moment you want to V-carve text into a sign — the most popular beginner project — you’ll hit the paywall.
That’s why we recommend Carbide Create first. Same capability, no paywall.
Use Easel if: you want the absolute simplest first experience, you have a reliable internet connection, and you don’t mind the Pro limitation. It’s particularly good if you have an Inventables machine, since integration is seamless.
Works on: Any computer with a modern browser. Go to easel.com.
The Long-Term Play: Fusion 360 Personal (Free)
Once you’re comfortable making 2D cuts, Fusion 360 is where you graduate. Autodesk’s personal-use license is free for hobbyists earning under $1,000/year from their projects, and it includes both full 3D CAD and CAM.
This is the software that lets you design complex 3D parts from scratch and generate multi-axis toolpaths. It’s what people mean when they say “real CAD/CAM.” The personal license includes:
- Full parametric 3D modeling
- 2.5-axis and 3-axis milling CAM
- Standard simulation and toolpath verification
- Cloud storage with 10 active editable documents
Don’t start here. We mean it. Fusion 360’s interface is overwhelming for someone who just wants to cut a sign. The learning curve is real. Expect to spend a few weeks watching tutorials before you’re productive. But when you’re ready to design custom brackets, enclosures, or anything in three dimensions, nothing free comes close.
The community’s advice is nearly universal: learn Carbide Create or Easel first, then move to Fusion 360 when you outgrow them. That transition usually happens 2–6 months in, when you start wanting to design your own 3D parts instead of downloading SVGs.
Works on: Windows and Mac. Download the personal license at autodesk.com/products/fusion-360/personal.
Other Free Options Worth Knowing
Kiri:Moto — The Hidden Gem
Kiri:Moto is a completely free, browser-based CAM tool that punches way above its weight. No account required. Just open it and go.
Its killer feature is 3D relief carving from STL files and images. You can import a photograph and it’ll generate a heightmap for 3D carving, a feature usually locked behind expensive software like VCarve. The interface is quirky and takes some getting used to, but for free 3D CAM, nothing else comes close.
Use it when you want to carve a 3D relief but don’t want to learn Fusion 360’s CAM workspace yet.
OpenBuilds CAM — Simple and Free
OpenBuilds CAM converts SVG, DXF, and bitmap files to G-code through a clean browser interface. It’s 2D/2.5D only, but it’s dead simple. Pairs well with OpenBuilds CONTROL for machine control.
Good for: people who design in Inkscape or another vector program and just need a quick, no-fuss way to generate toolpaths.
FreeCAD — Open Source, Steep Curve
FreeCAD is a fully open-source parametric 3D modeler with a built-in Path Workbench for generating G-code. It’s the principled choice if you care about open source.
It’s not beginner-friendly for CNC. The UI is clunky, the CAM workflow has a steep learning curve, and the documentation assumes existing CAD knowledge. We’d only recommend it if you’re already comfortable with 3D modeling or if open source is a hard requirement for you.
EstlCAM — Almost Free
EstlCAM is technically not free — it’s about $60 for a license, but it deserves a mention because the CNC community loves it. It functions as both CAM software and a machine controller, and it’s extremely beginner-friendly. The free trial works indefinitely with a nag screen.
It’s hugely popular in the V1 Engineering / MPCNC community and frequently recommended on the Sienci forums. If $60 isn’t a barrier, it’s worth a look.

The Senders: Getting G-Code to Your Machine
If you’re using Easel, machine control is built in. For everything else, you need a separate sender application. The good news: every good sender is free.
Start with gSender (from Sienci Labs). It’s our top pick: clean interface, works with any GRBL machine, includes probing and tool-setting wizards, and it’s free and open source. Sienci built it for the LongMill, but it works beautifully with Shapeoko and OneFinity machines, and most other hobby CNCs.
UGS (Universal G-Code Sender) is the reliable alternative. It’s been around longer, runs on Java (so it works everywhere), and has a huge user base. If gSender gives you trouble for any reason, UGS is the fallback.
Other senders worth knowing:
- Carbide Motion — if you have a Shapeoko or Nomad. Simple and solid but designed specifically for Carbide3D machines.
- OpenBuilds CONTROL — pairs with OpenBuilds CAM. Clean and straightforward.
- CNCjs — runs in a browser, can be hosted on a Raspberry Pi for a wireless CNC setup. Great for more technical users.
gSender has become the community favorite since its release — clean UI, probing wizards, and active development from Sienci. UGS remains the reliable fallback. Most users try the sender that came with their machine, then switch to gSender within a few months.
Source: r/hobbycnc, Sienci Forum
The Learning Path: What Order to Install Everything
Follow this order. Each step builds on the last.
Week 1–2: Carbide Create + gSender. Design a simple sign or nameplate. Generate the toolpath. Send it to your machine. Make your first cut. This is the “hello world” of CNC. If you have an Inventables machine or want the absolute easiest start, use Easel instead.
Month 1–3: Keep using Carbide Create. Make signs, try V-carving, cut some profile pieces. Learn about feeds and speeds. Get comfortable with your machine before adding software complexity.
Month 3–6: Add Fusion 360. When you want to design your own 3D parts — custom brackets, enclosures, jigs, install Fusion 360 Personal and start learning. The “Learn Fusion 360 in 30 Days” YouTube series from Product Design Online is the best free course.
When you hit a wall: Consider VCarve Desktop (~$350). If you’re doing a lot of sign work, V-carving, or decorative pieces, VCarve Desktop is the natural upgrade. It’s not free, but it’s the tool that most serious hobbyists land on for 2D/2.5D work. One-time purchase, no subscription. Factor it into your first-year CNC budget if you can.
What About Design Software?
You’ll eventually need a design tool that isn’t your CAM program. For 2D vector work (logos, sign layouts, decorative designs), Inkscape is free and excellent. It exports SVG and DXF files that every CAM program can import.
For image editing and creating designs from photos, GIMP works but Inkscape’s trace bitmap feature is usually enough.
If you’re coming from a graphic design background, you can absolutely use Adobe Illustrator — just export as SVG. But don’t buy it just for CNC. Inkscape does the job.
A Note on Machine-Specific Software
Some machines come bundled with specific software. The Shapeoko ships with Carbide Create and Carbide Motion. OneFinity machines use their own controller interface. The Sienci LongMill recommends gSender.
Use whatever came with your machine for the first few weeks. The manufacturers chose it because it works well with their hardware, and their tutorials assume you’re using it. Once you’re comfortable, branch out to the options above.
If you’re still picking a machine, factor in the software ecosystem. A machine with good free software bundled (like the Shapeoko) removes one more barrier to getting started.
We don't write in a vacuum. Here's what we studied, what we trust, and why.